

By Wood-Mizer, Canada
February 23, 2023
Do you need to know how to check your portable sawmill's drive belt tension? Here are Wood-Mizer’s step by step instructions on how to check the drive belt tension for the LT15, LT28, and LT35 portable sawmills made before 2016 as well as LT40 and LT50 portable sawmills with Auto-Clutch made before 2016.
How To Check Drive Belt Tension for LT15, LT28, and LT35 Portable Sawmills Made Before 2016:
Before you start, remember that for any of the LT15 models you will need ½ inch of deflection with 14lbs. of force, while the LT28 and LT35, will need 7/16 inch of deflection with 14lbs. of force.
Feel free to pre-mark your tool where these measurements will be when decompressing with the tool. Next, place the rubber stopper in the palm of your hand and place the tool on the center of the tension belt pressing down until that 7/16 or ½ inch mark is flush with the top of the access hole.
1. To start, take a straightedge and make sure it bottoms out against your housing or, if it is thin enough, have it go all the way down to your drive side wheel. When doing this, make sure it goes over top of the wheel at the top of the machine.

2. Then prep your Drive Belt Tension Gauge. Make sure the poundage is at 0 and you know your correct measurement.
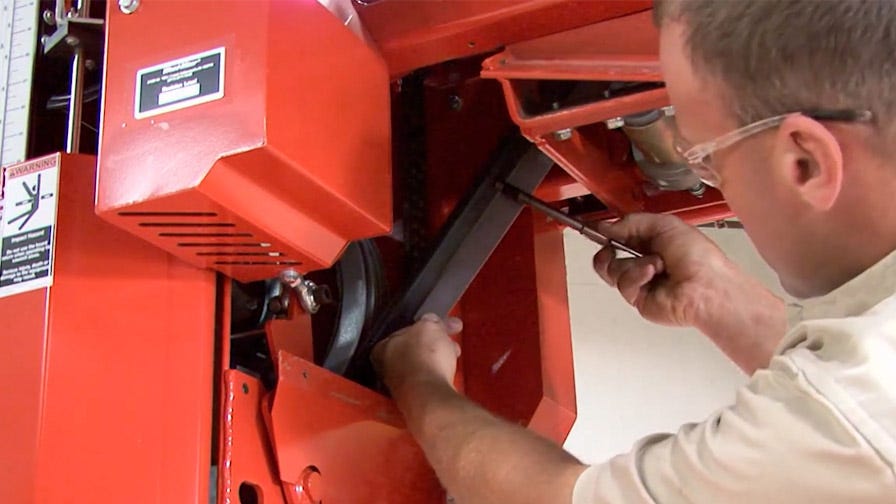
3. Now it is time to test your belt, using one hand hold down the piece of the straightedge that comes over the top wheel, ensuring that it does not move.
Then place your gauge halfway between the two wheels, making sure you only deflect the belt and not the straightedge, release the gauge and check to make sure the poundage is 14lbs.
If the Poundage is Incorrect:
1. To set the drive belt tension if the poundage is incorrect, make sure your machine is engaged, loosen the top nut and tighten the bottom nut on the backside of the machine.

By doing this you are pushing more pressure onto the drive belt with the drive belt engaged.
2. Once you have done this step, make sure the nuts are snug against the block and recheck the drive belt tension as done previously.
If you have any questions, please contact Wood-Mizer.
How To Check Drive Belt Tension for LT40 and LT50 Portable Sawmills with Auto-Clutch Made Before 2016:
1. Engage Auto-Clutch and remove the underneath cover.
2. Once all 4 bolts are out and you have removed the cover, take a straightedge and a Drive Belt Tension Gauge. You will be deflecting the belt 7/16 of an inch. Place the straightedge next to the belt and underneath the top pulley. Make sure that the straightedge does not move when you deflect, only the belt should move.
3. When you get ready to measure, try to get as close between the two pulleys as you can. Place the gauge on the center of the belt, right underneath the board return. Once you have deflected the belt 7/16 of an inch, it should read 18lbs.
If the Poundage is Incorrect:
1. If your gauge did not read 18lbs, after deflecting, locate the turnbuckle and loosen the top jam nut with a 11/16 inch wrench. And use a 7/8 inch wrench to move the turnbuckle.

During this process, make sure to the bottom lock nut locked.

2. Then check again to make sure it takes 18lbs. to deflect your drive belt. Continue step #1 until the deflection is at 18lbs.
3. Once you have made sure the deflection poundage is correct, go back and tighten up your jam nut at the top and bottom. If the turnbuckle comes loose, you could have severe engine problems.
4. You will also want to make sure that when your Auto-Clutch is disengaged that there is a gap between the top and bottom parts of the turnbuckle.
If There is No Gap on Your Turnbuckle:
1. If there is no gap at the top and bottom of your turnbuckle, you need to locate the bolts above the break strap, reengage Auto-Clutch, and loosen those bolts.

2. After loosening them, you can slide the break belt down and then tighten the bolts, disengage Auto-Clutch and check the turnbuckle again.
Final Checks:
1. Once the bolts and jam nuts are tightened, recheck your deflection one more time. For a new sawmill, check this every 20 hours of use and 50 to 75 hours for an older sawmill.
If you have any questions, please contact Wood-Mizer.