
By Wood-Mizer, Canada
February 22, 2023
Need to learn how to install a transducer on a portable sawmill with Accuset 2 controls? Here are Wood-Mizer’s step by step instructions on how to install a transducer using the Accuset 2 for a Wood-Mizer LT30, LT40, or LT50 portable sawmill.
How To Install a Transducer Using the Accuset 2 on a LT30, LT40 or LT50 Portable Sawmill:
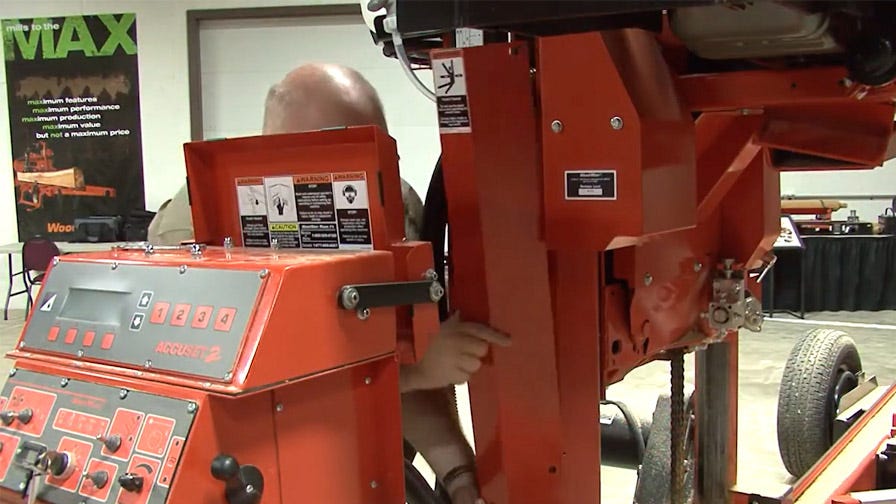
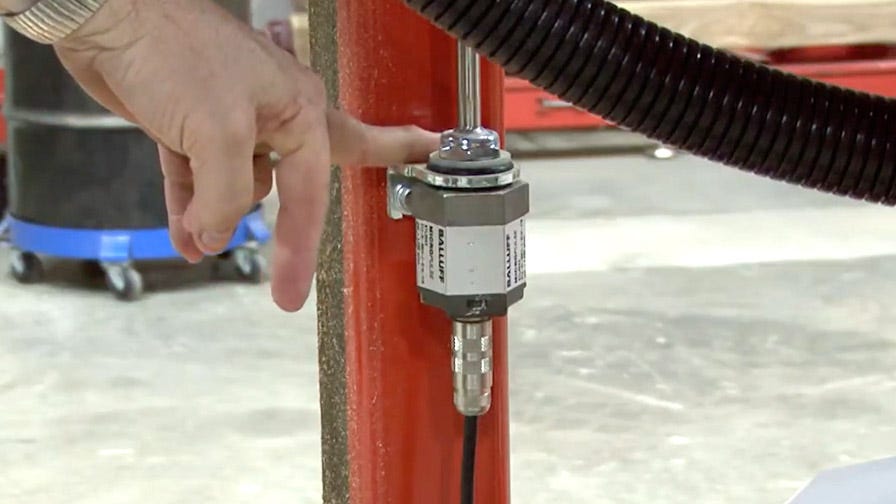
1. Start by removing the covers to access the transducer.
2. Next raise the saw head to ensure the magnet is as close to the top bracket as you can.
This is done to make sure it is easier to pull the transducer out of the top bracket and the magnet at the same time without removing the bracket.
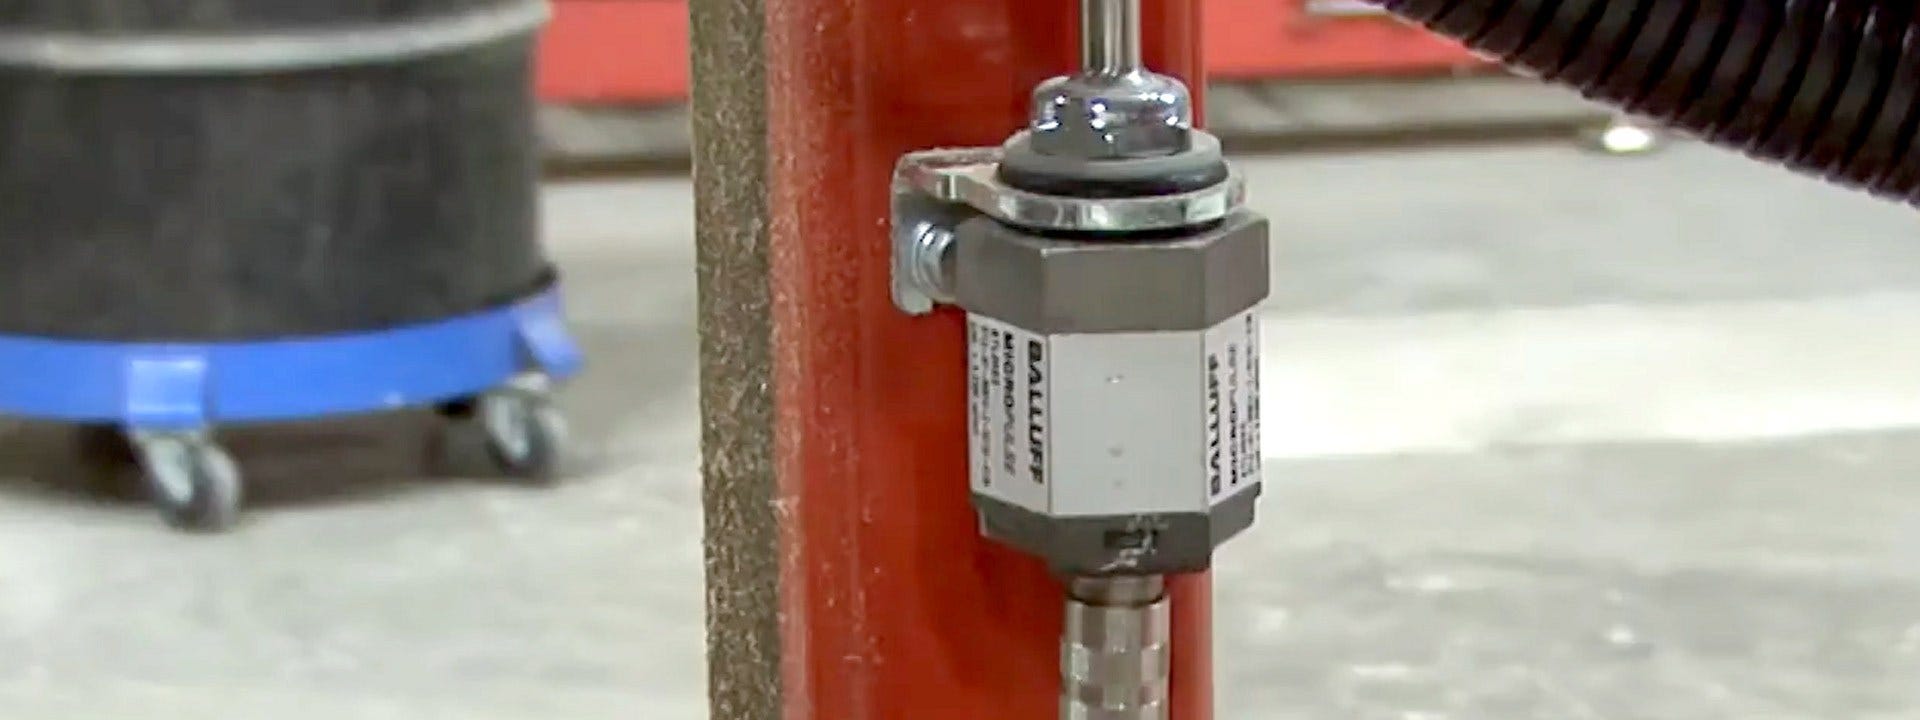
3. Now remove the lower bracket and take off the transducer.
You can remove the lower bracket by loosening the two mounting bolts that hold it to the mast.
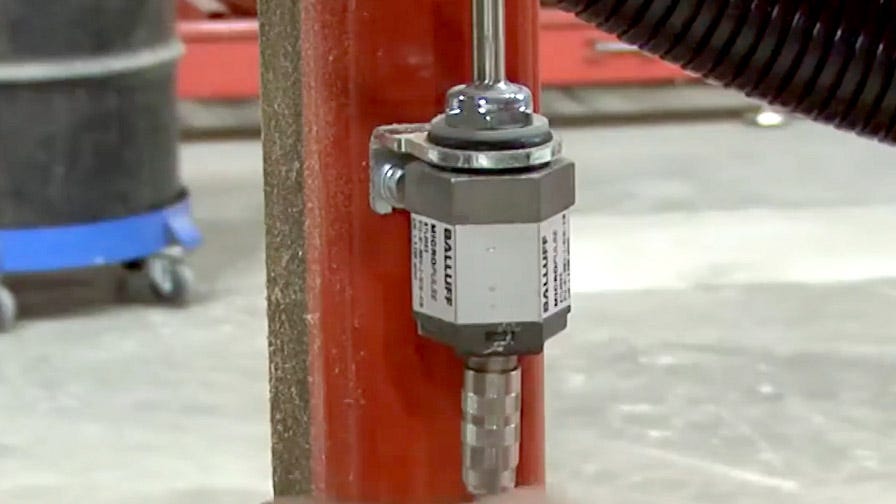
4. Once that is done, lift on the transducer, slide it out of the upper brackets, and then swap the lower bracket onto the new transducer.
When installing the new transducer, be sure that the identification label is aiming outward. Ensuring that you can read it.
Calibrating the Transducer with Accuset 2:
1. Now that the Accuset 2 transducer is installed, place the covers back on, and calibrate the machine to match the transducer.
You will need to calibrate the Accuset 2 to the gradient number that can be read off the side of the transducer or on the box the transducer came in. It will be an 8.4 or 9.4-digit number.
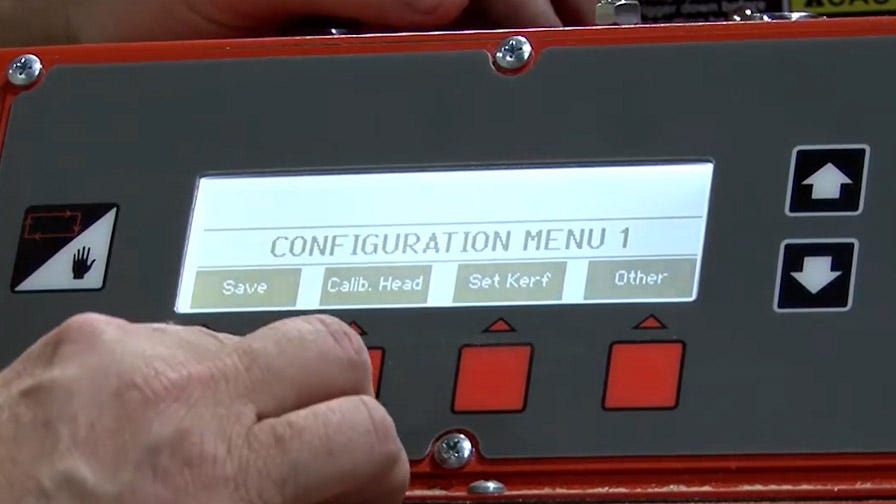
2. Make sure your Accuset 2 controls are in manual mode. Select the up arrow and then select “calibrate head” and then select “gradient”.
You will use the up and down number to set the top number to match the number on the transducer.
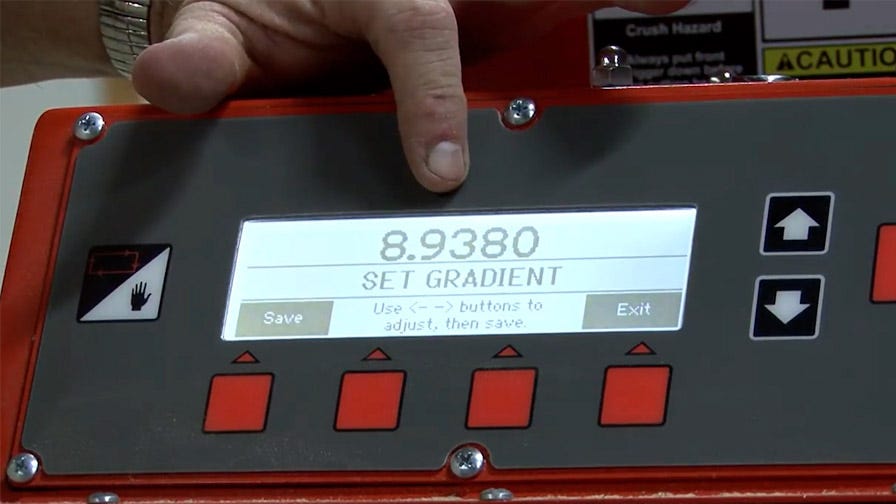
3. You will then select “save” 3 times as it appears on the screen.
Resetting Blades with Accuset 2:
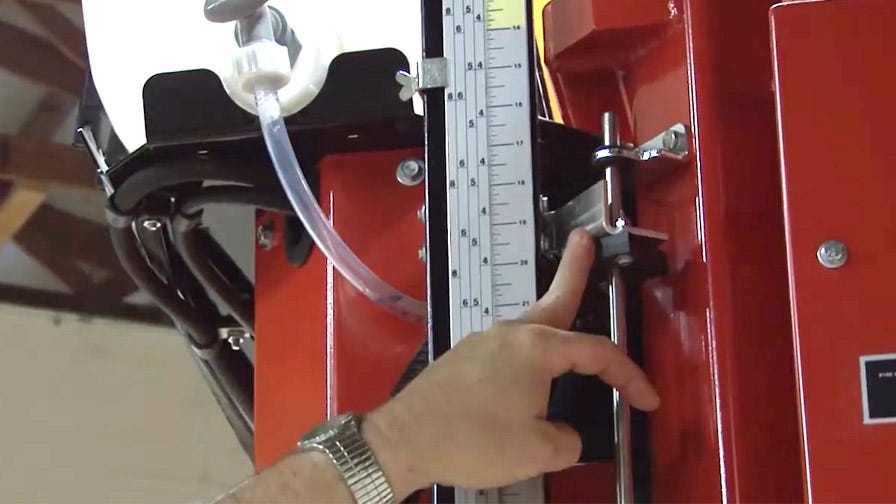
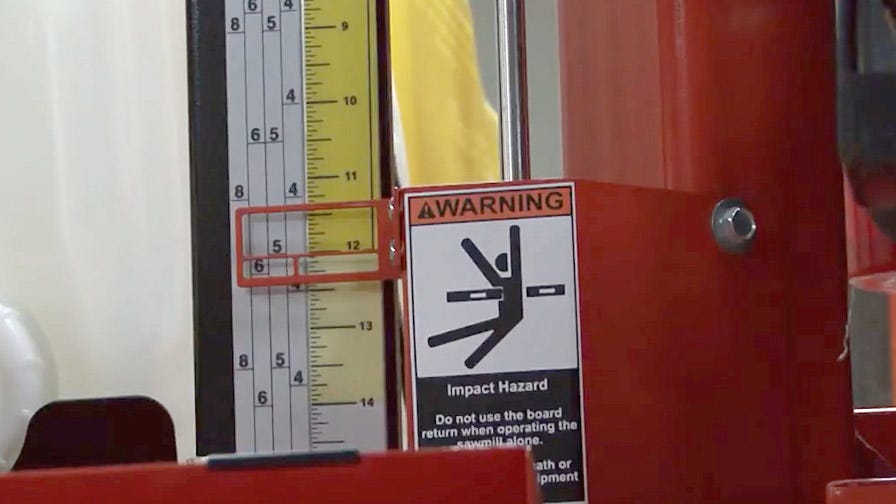
1. Now that the gradient is set, you must reset the 12 inch measurement of the sawmill blade.
Lower the blade to 12 inches above the bed rail, go back to manual mode, select the up arrow, calibrate head again. And select the “set at 12 inch” button. This will match your screen to the transducer.
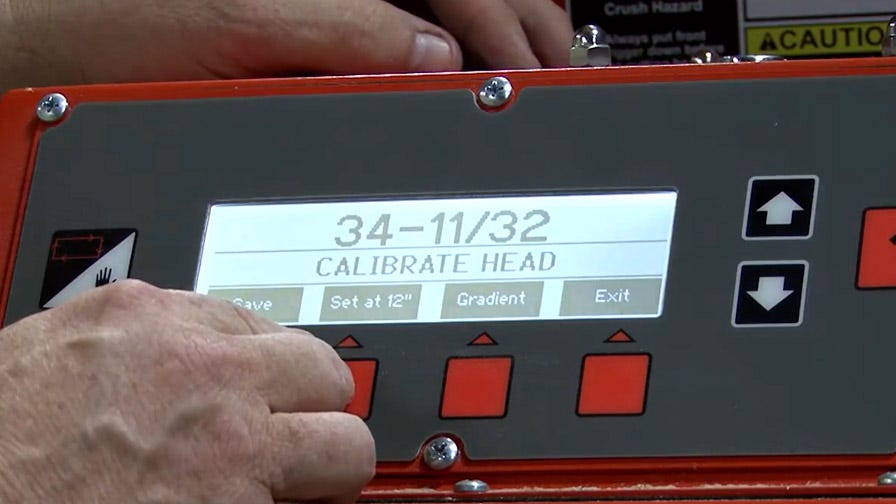
2. Then make sure to select “save” two more times as it appears on the screen.
3. Lastly, you will need to set your manual scale back to where it was. Lower the screen until you are on 12 inches. Then look at the scale and see if they match.
If the Scale Does Not Match
1. If the scale doesn’t match, loosen up the two bolts on the scale. And you will then line up the scale with the 12-inch marking.
If you have any questions, please contact Wood-Mizer.